- September 08th, 2014
- /
- Pocket Hole Joinery Tips
- /
- 0 Comments
- /
- Building stairs with pocket screws

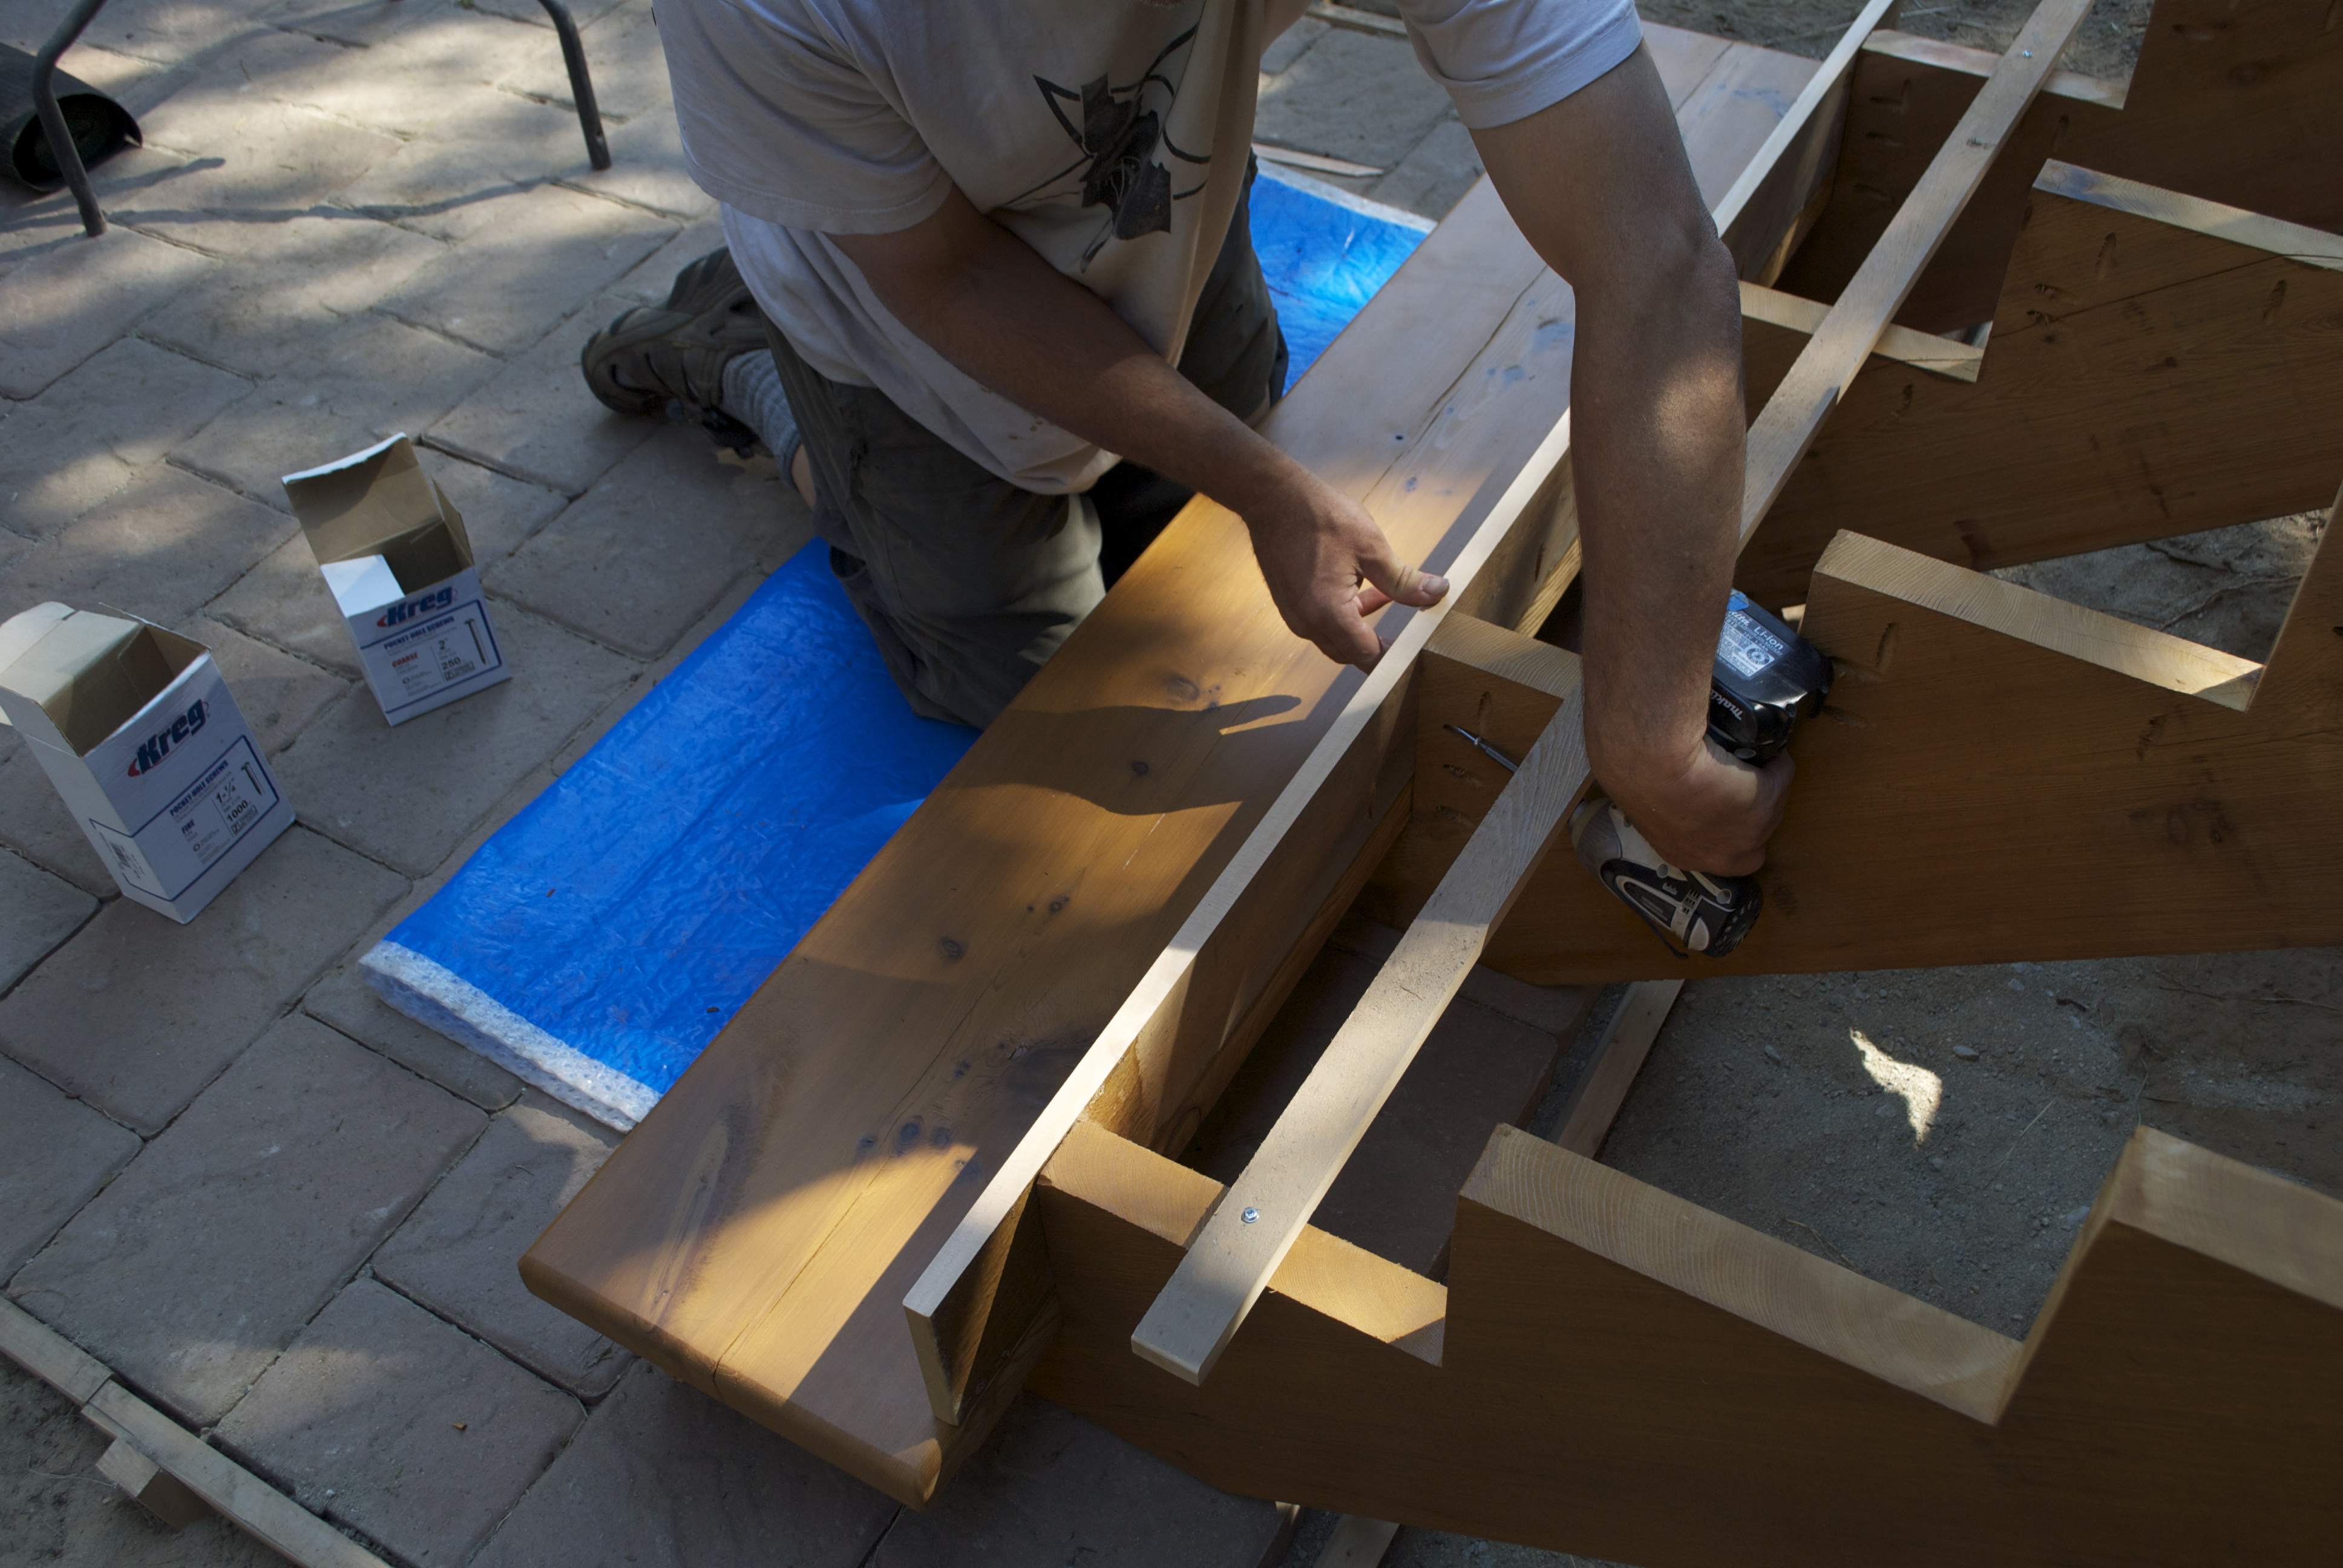
I’ve never built a set of stairs with pocket screws. Sometimes that’s the most entertaining way to build with pocket hole joinery. Trying to figure out how to integrate pocket screws into a project where almost no one would consider it an option. The starting point is to envision the project from the hidden side. The area that can’t be seen by the casual observer. A Stair project is easy to visualize as any location under the stairs or behind the stringers is fair game.
I start by attaching each stringer to the porch with 4-2 1/2” pocket screws.
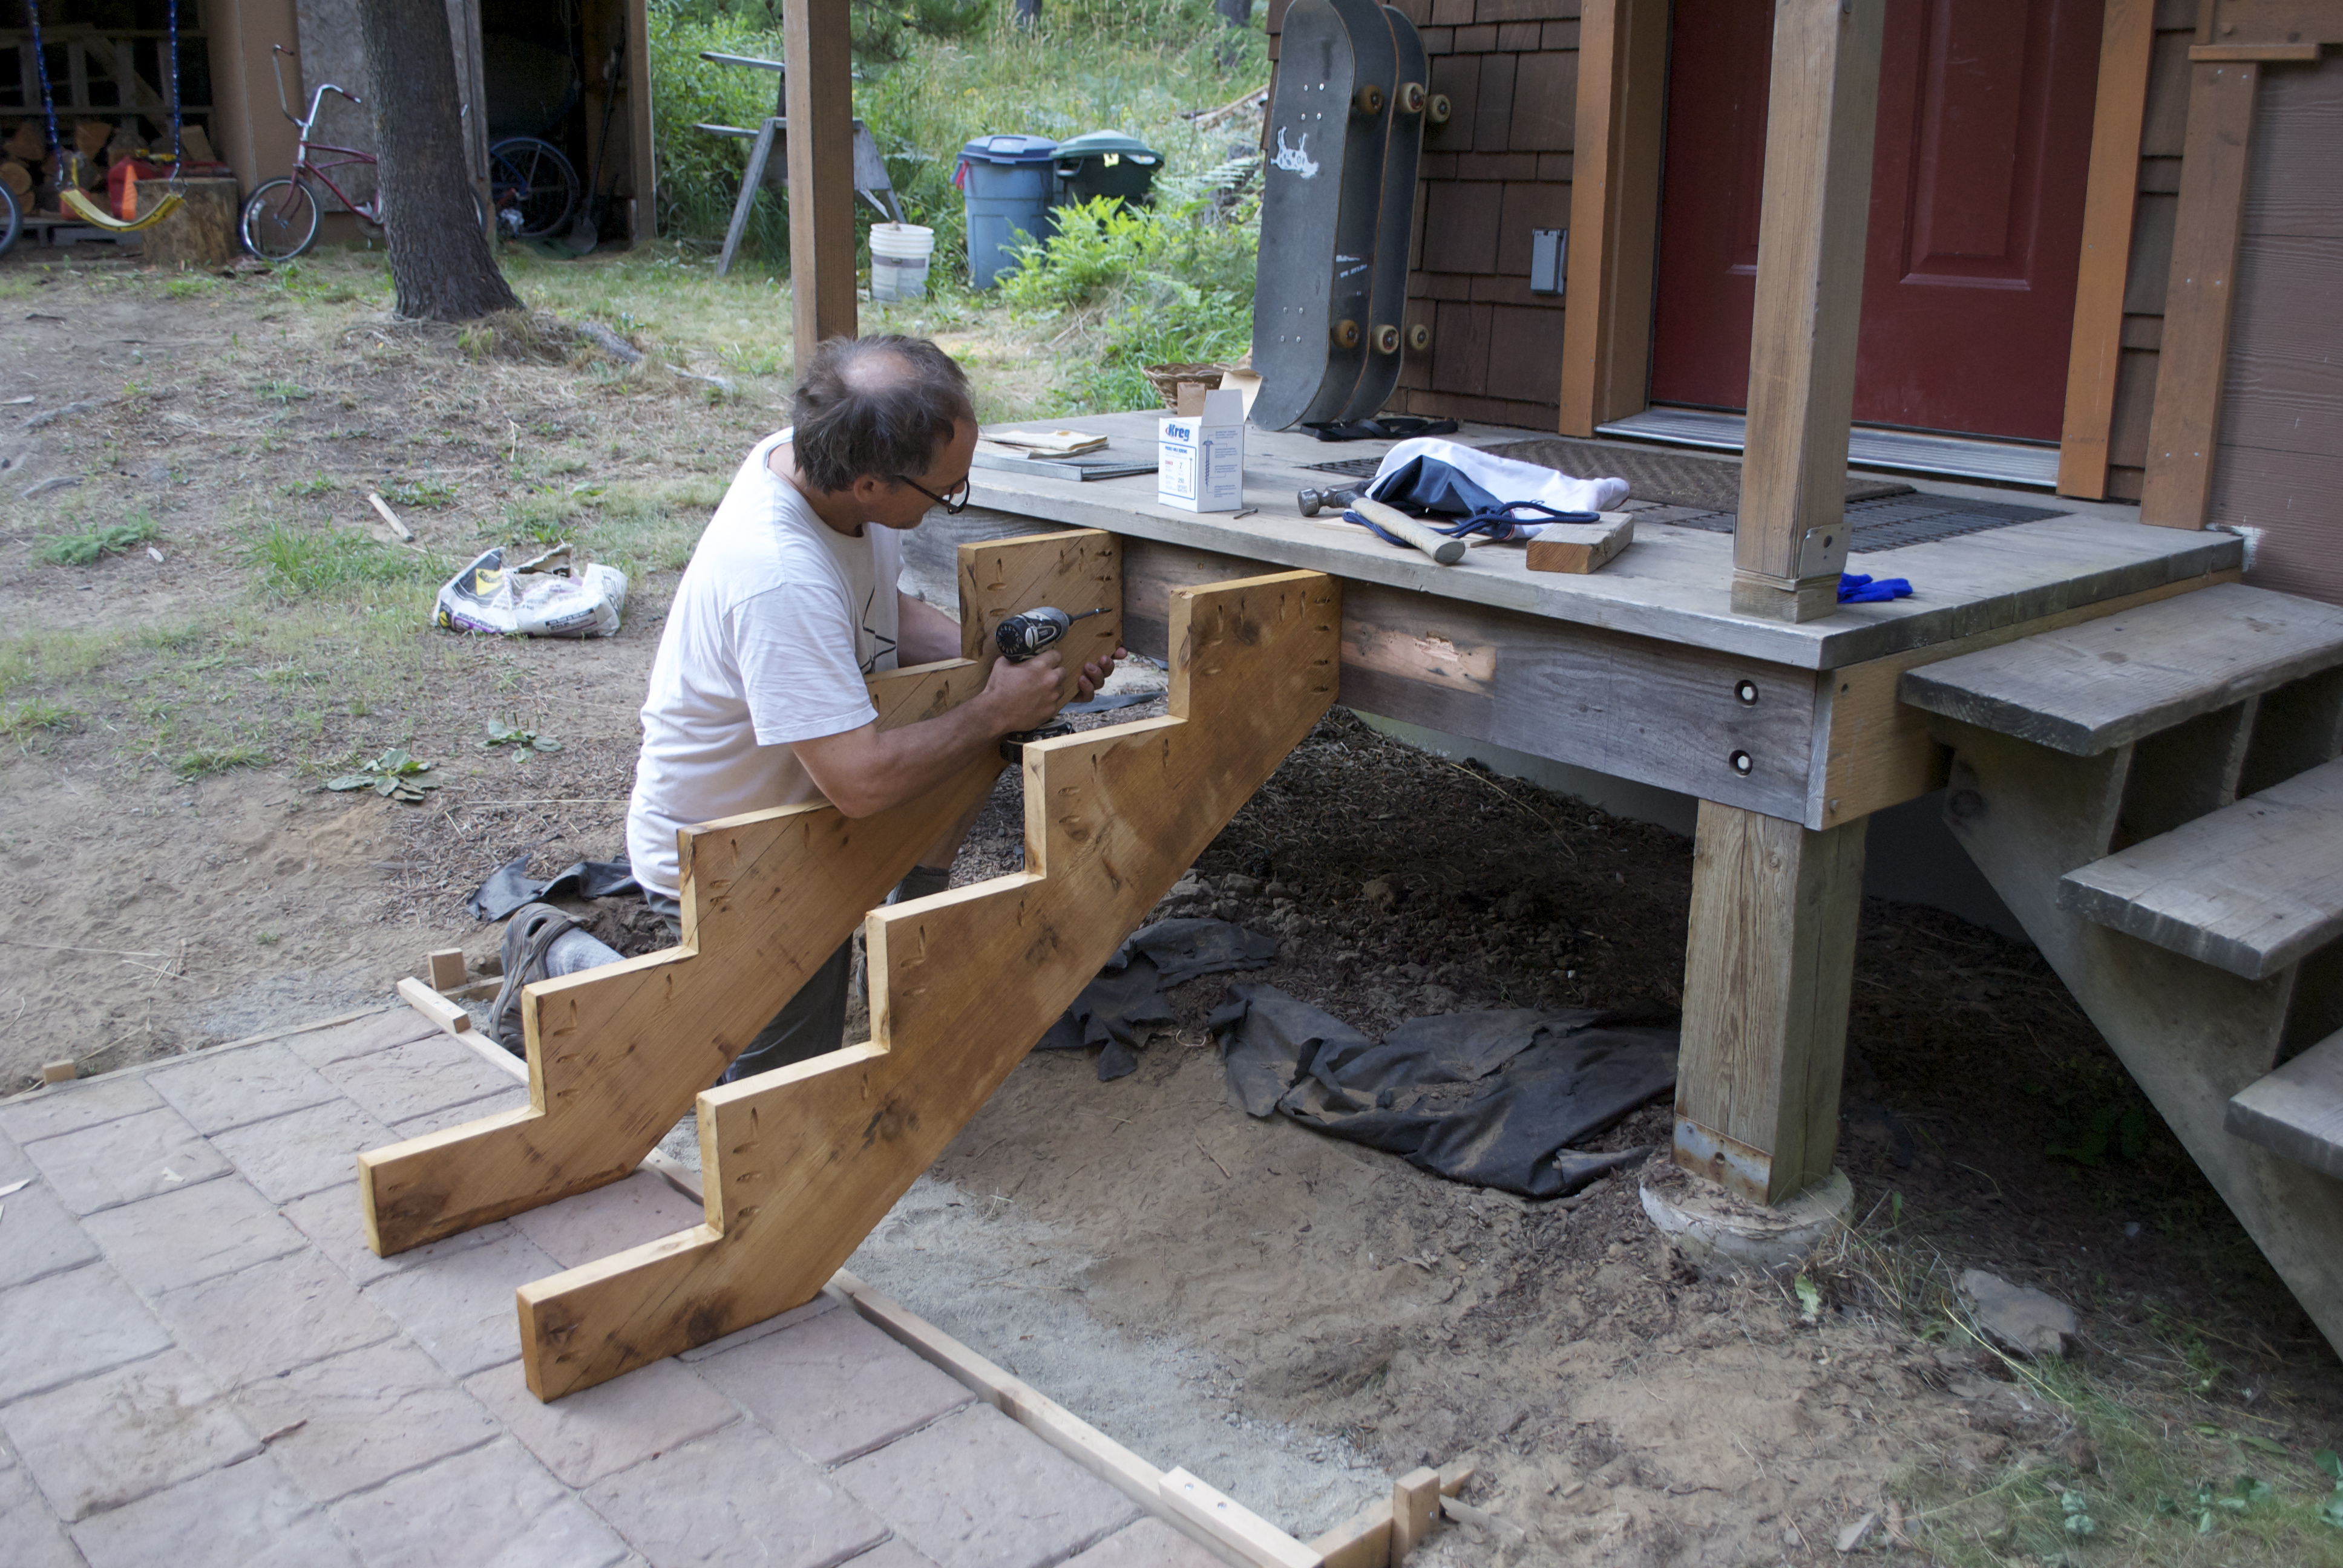
four 2 1/2″ pocket screws per stringer
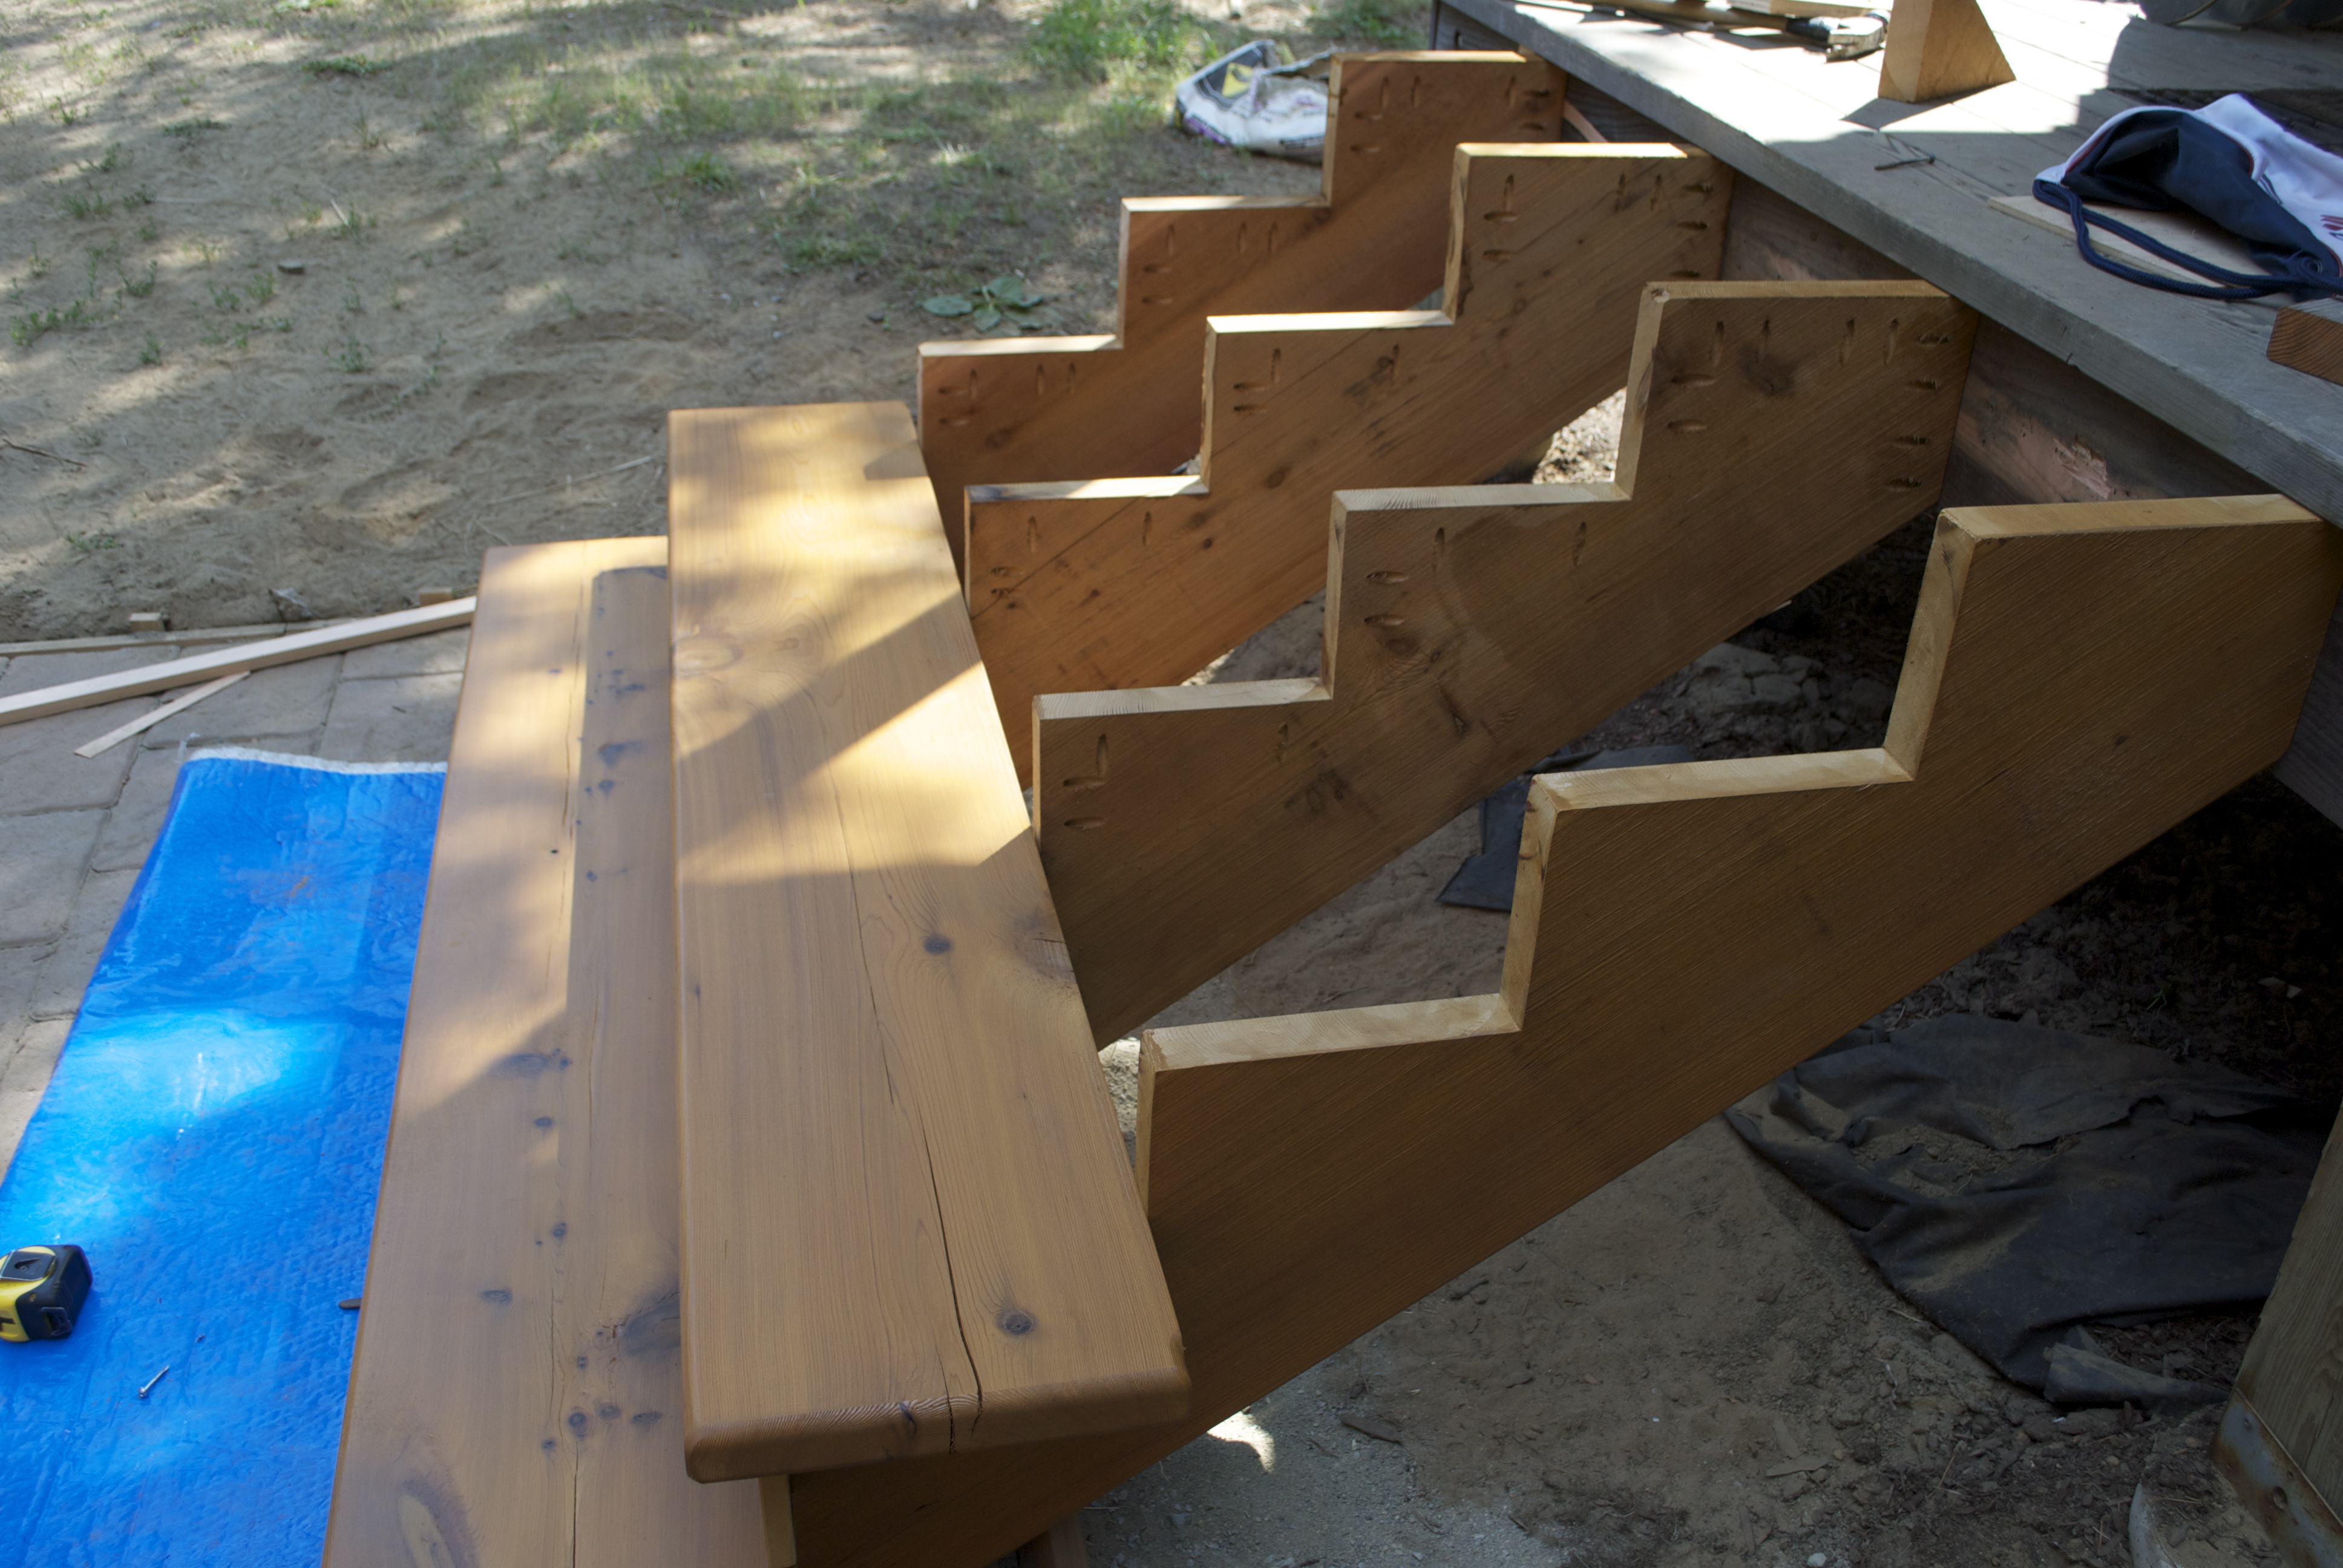
The obvious challenge will be figuring out how to attach parts in hard to reach places especially on the first step. I start with the first riser and tread. Attaching the tread first to the riser then placing it on the stringers and driving screws from below seems to be the solution.
attach riser to tread with pocket screws first before installing
Place assembled tread riser combo on stringers and screw into place
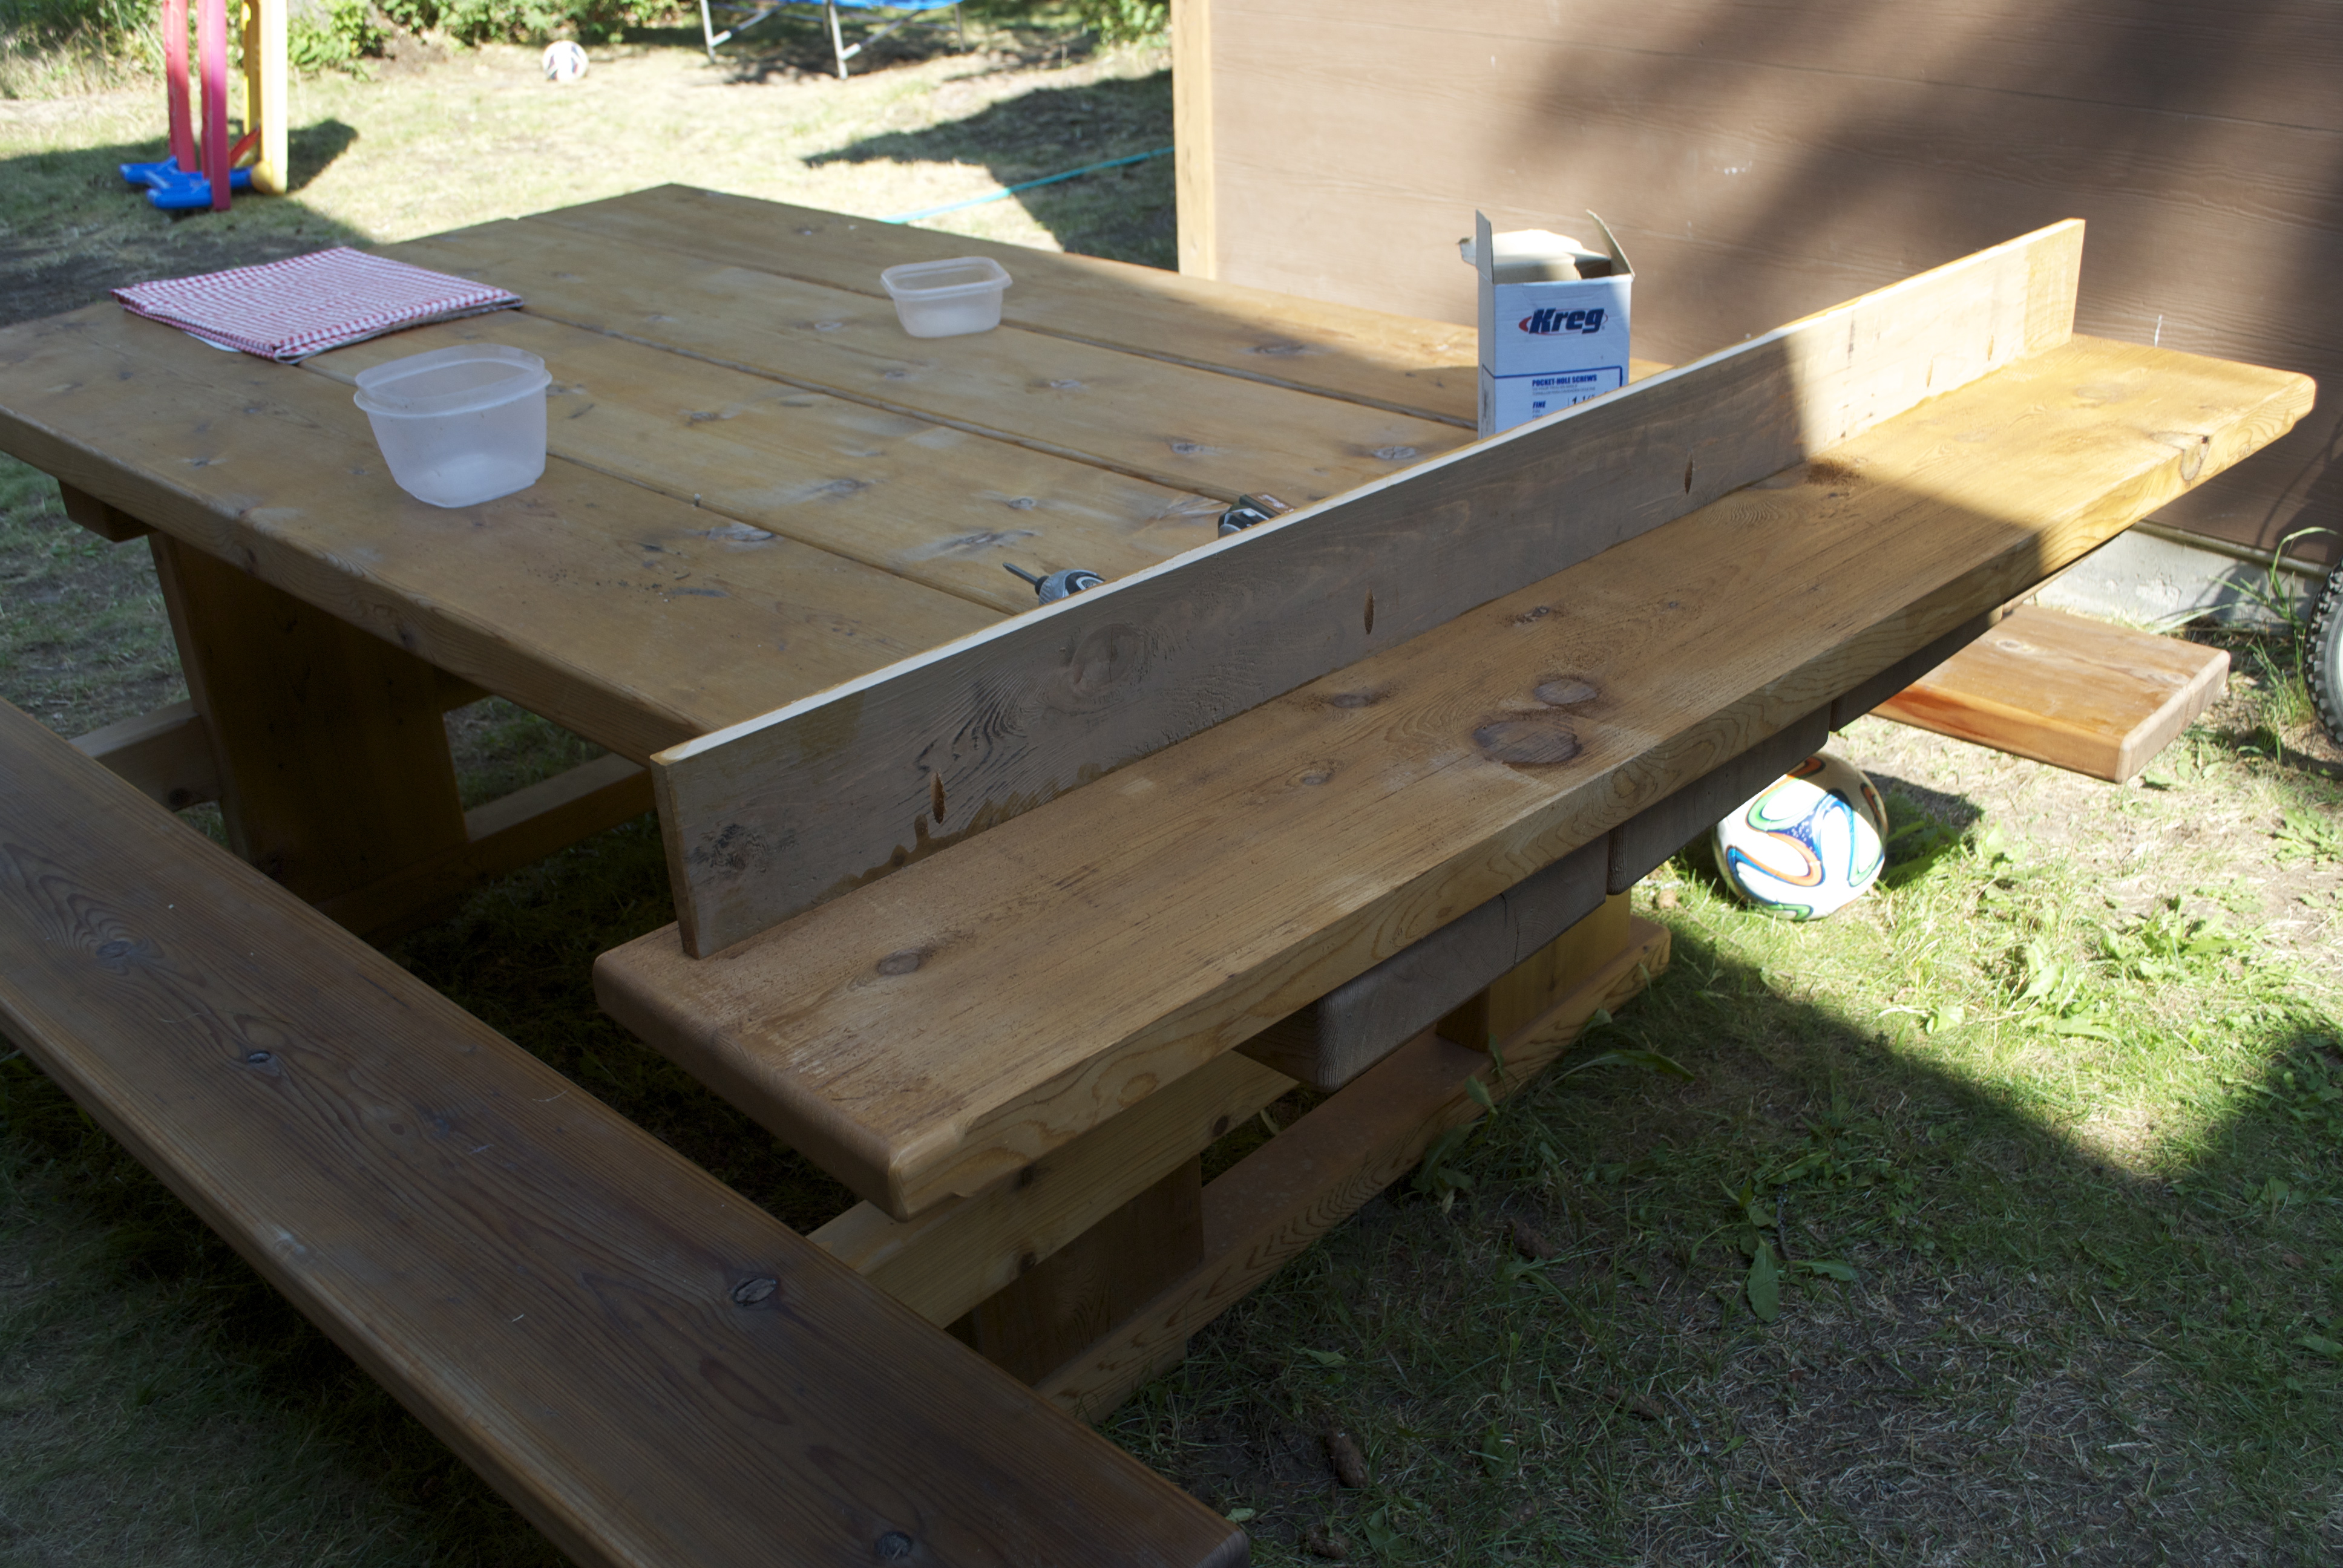
The first tread is a bit difficult to attach. I screwed through the stringers into the riser then on pocket screw into the back of the tread from the stringer going horizontally.You can see the one pocket hole in the above pictures that attaches to the back of the first tread.
After the first tread is in, I pocket screw the next riser down.
attach the next riser to the stringers with pocket screws
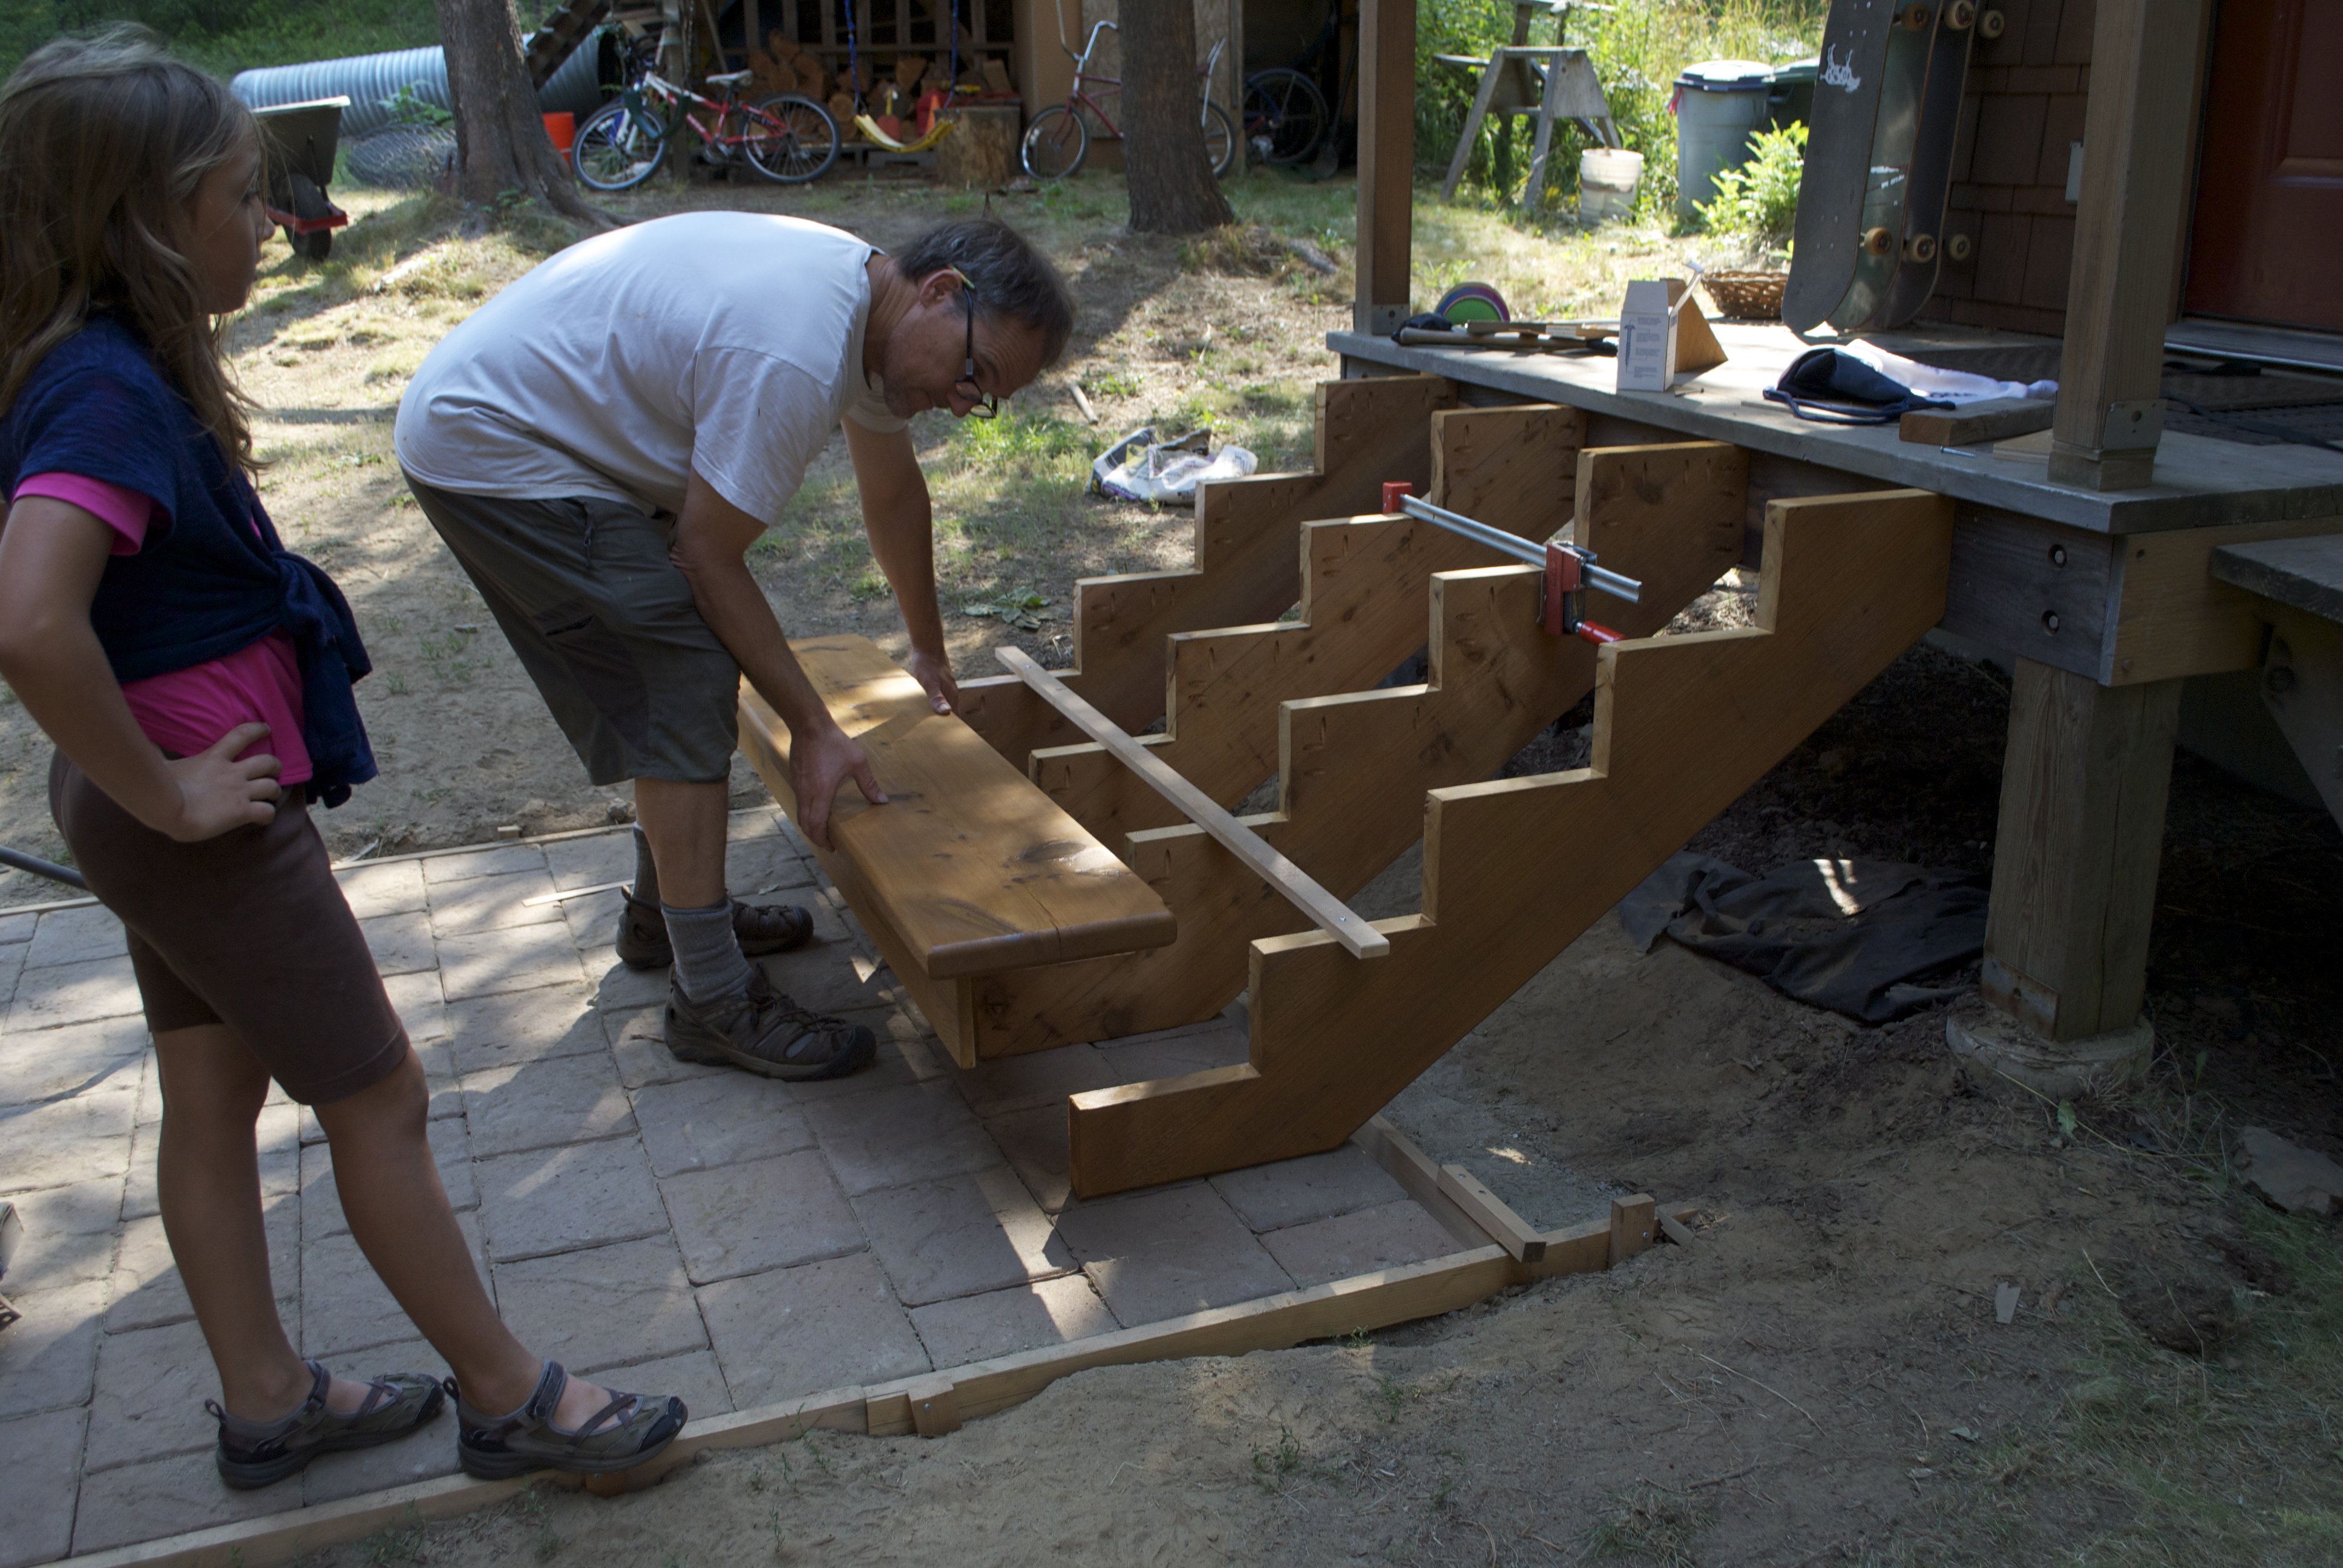
Then plop the next tread down onto the stringers and screw from underneath. The project kinda falls into place.
set second tread on stringers and pocket screw from underneath
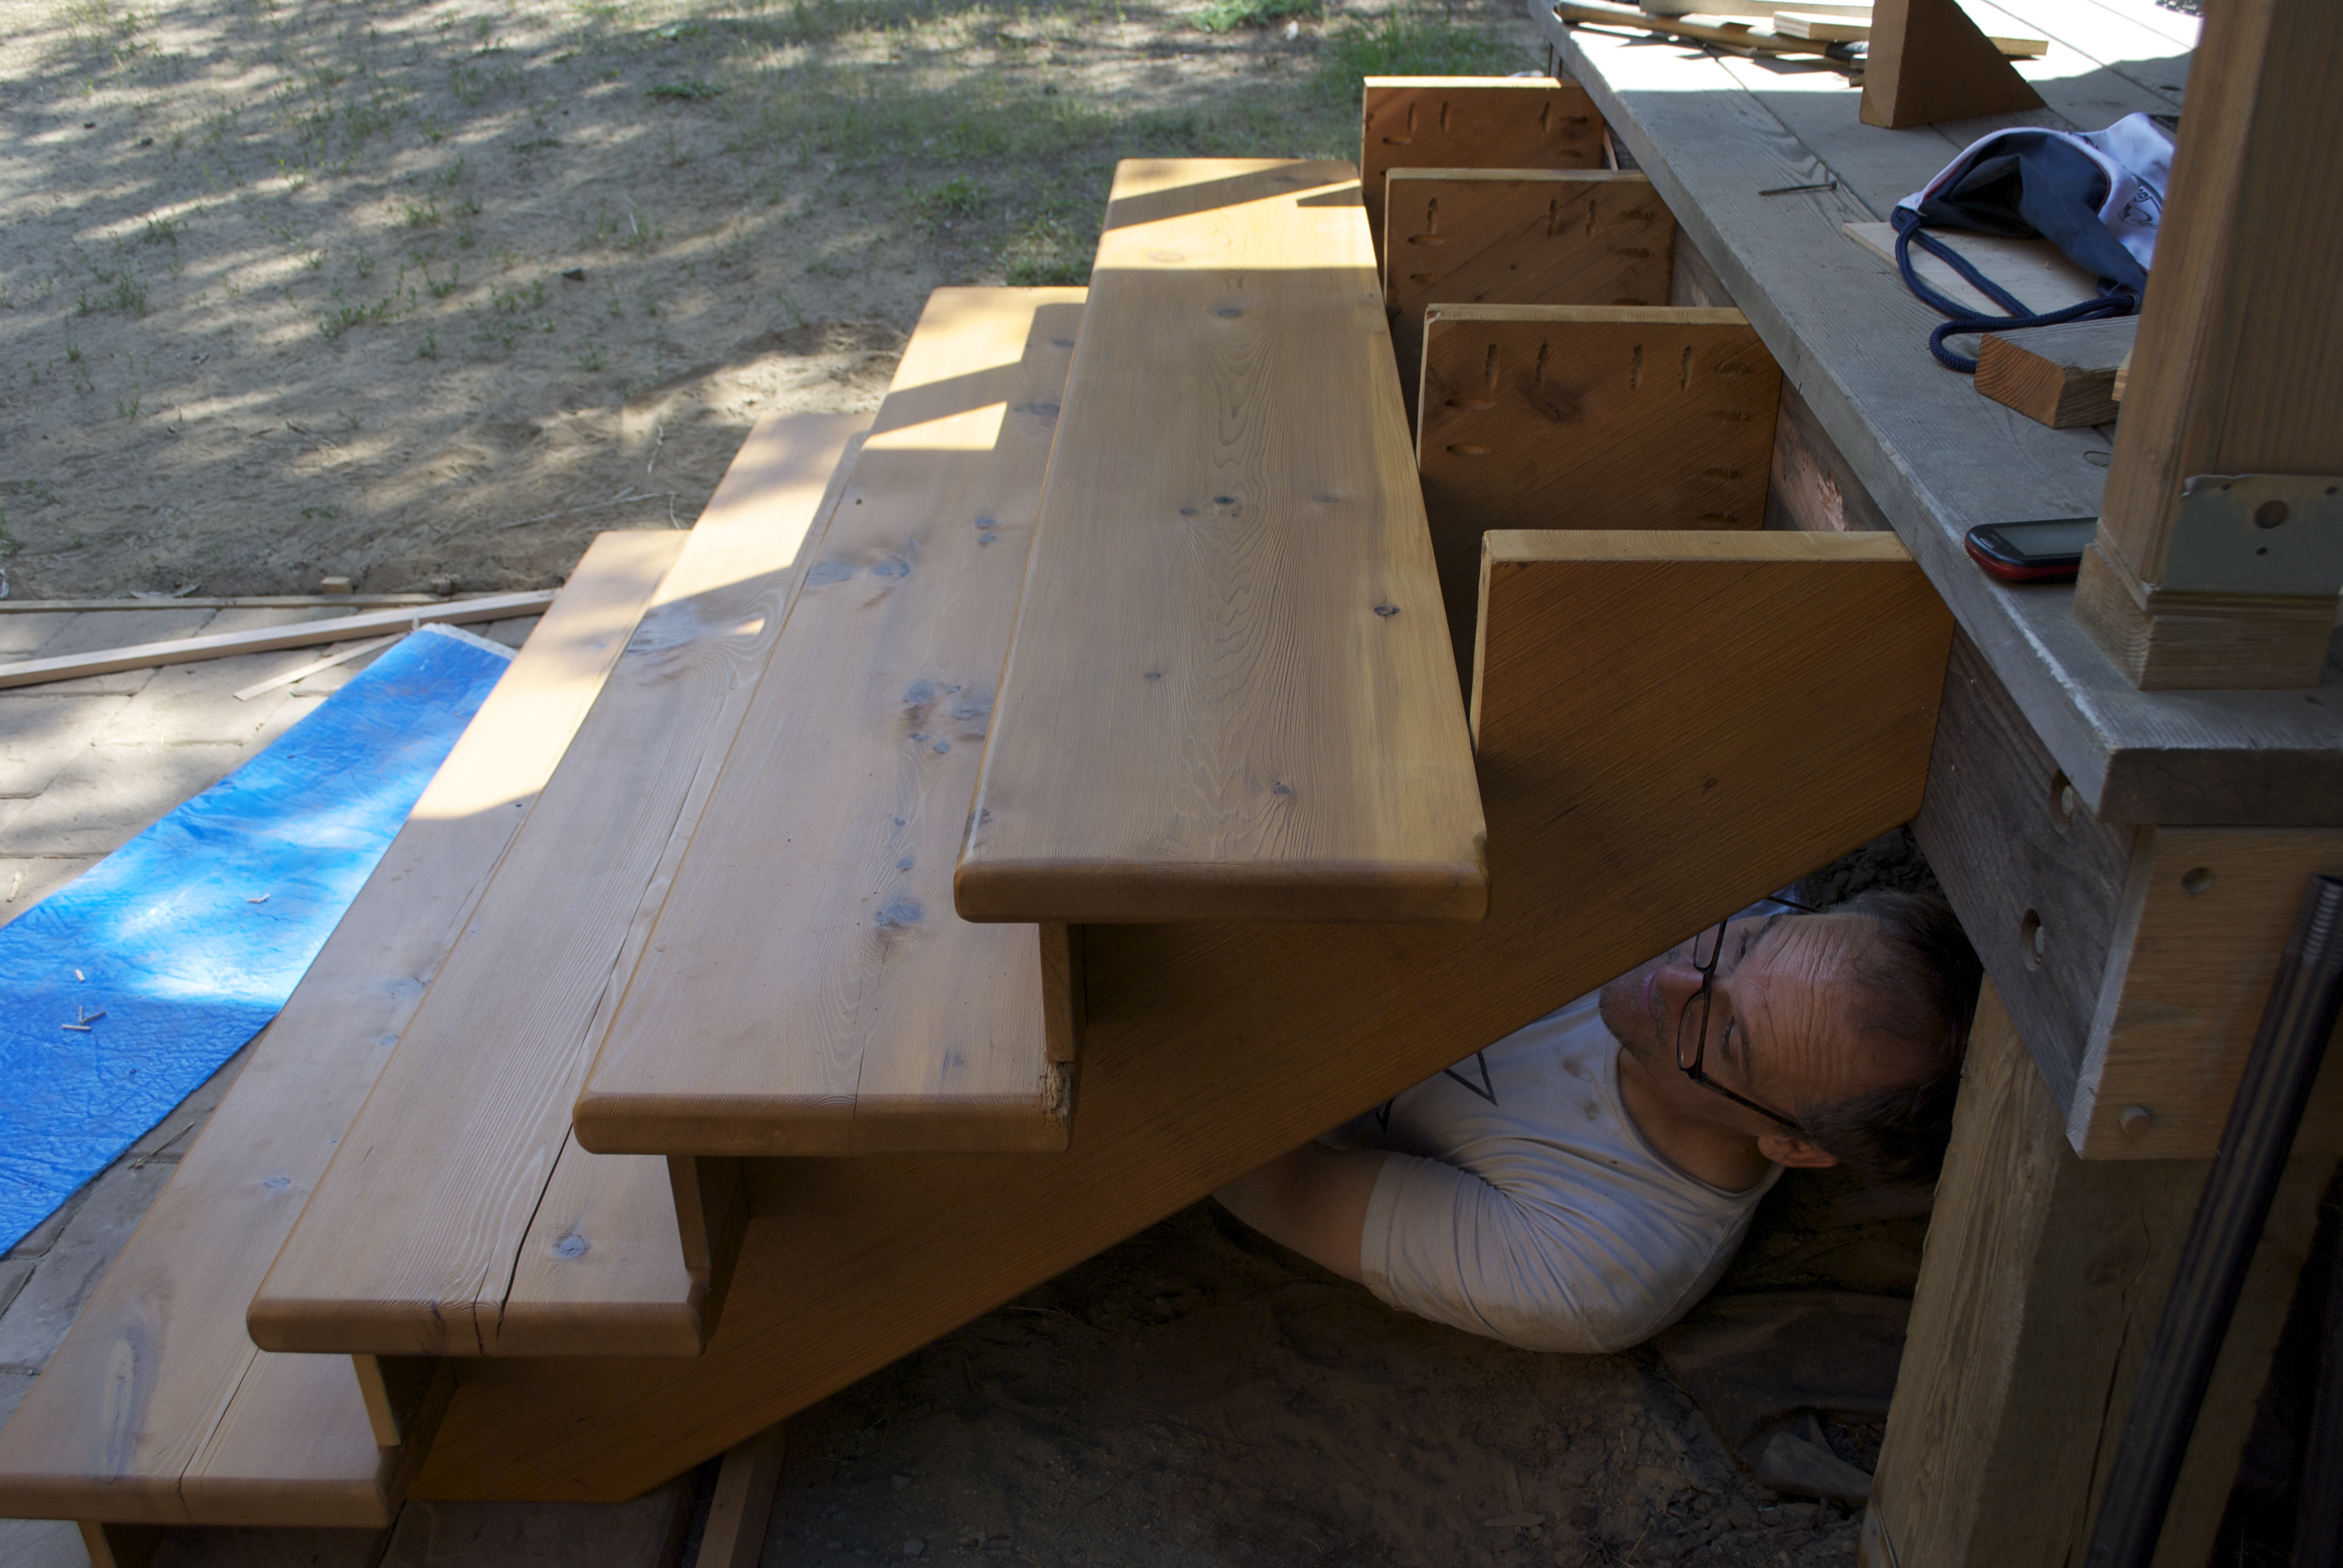
there is just enough room under the stairs to attach the treads
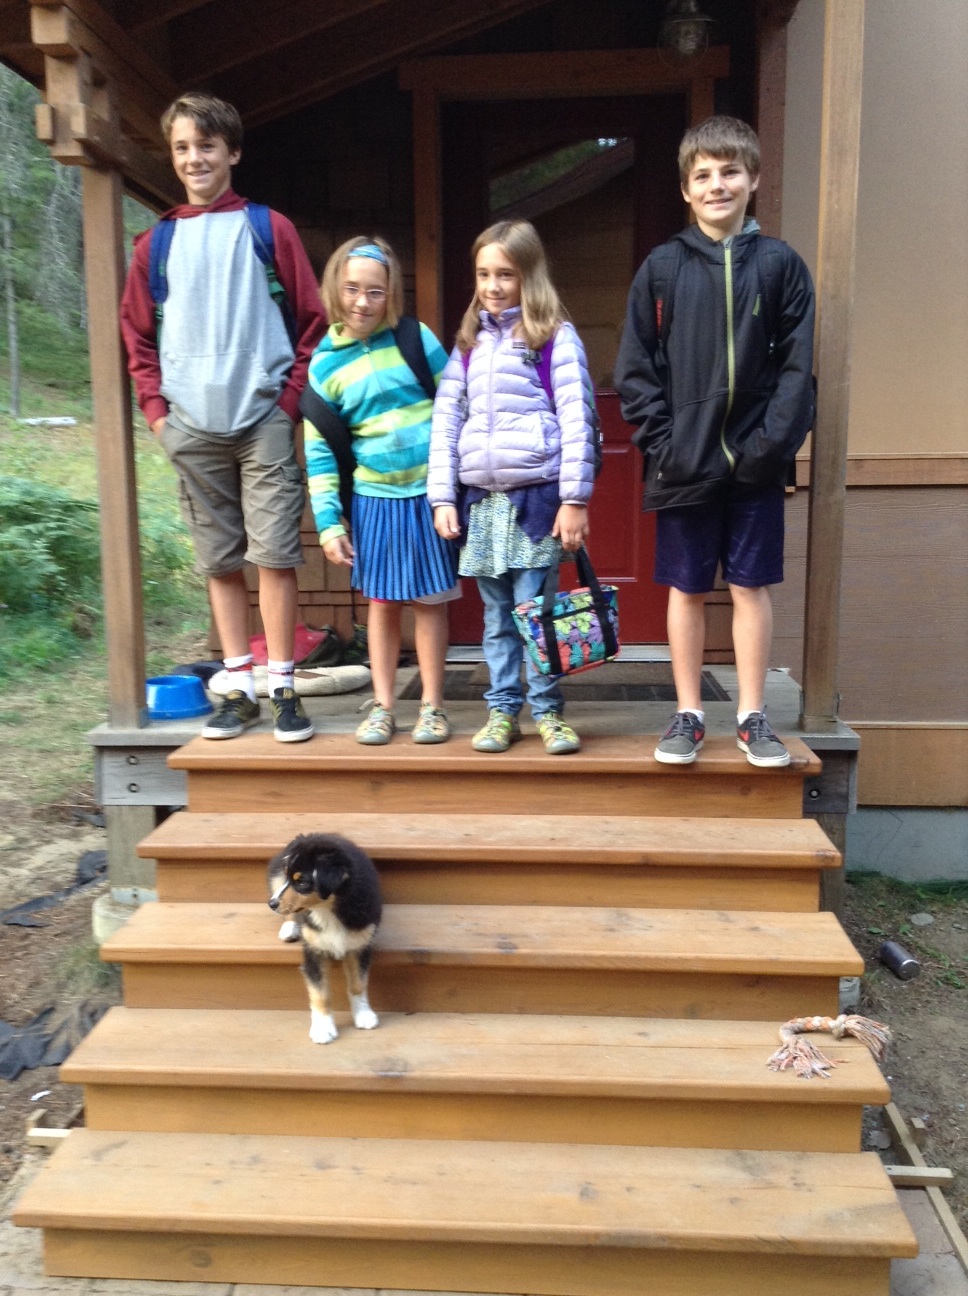
Assembling the stairs with pocket holes was fast, clean and strong thankfully considering the crew that will be putting them to the test.